
Environments
What is an Environment?
An environment is an entity representing a deployment managed by env0.
Your users manage their environments in env0 in Projects.
They can create, destroy, and redeploy environments.
The user who creates an environment is the owner.
Administrators manage access-control and budgets with policies, defined in the Project and Organization scopes.
Here’s how env0 environments correlate with terms from various IaC and cloud management tools such as Terraform, Terragrunt, CloudFormation, Pulumi, Kubernetes, and Helm:
- Terraform: An env0 environment is equivalent to a Terraform workspace or module. For example, a
production-vpcenv0 environment aligns with a Terraform workspace for the production VPC. - Terragrunt: An env0 environment matches a specific Terragrunt configuration directory managing Terraform modules. For instance, a
staging-appenv0 environment links to a Terragrunt configuration for the staging app. - CloudFormation: an env0 environment corresponds to a CloudFormation stack. For example, a
test-stackenv0 environment represents a CloudFormation stack for the test environment. - Pulumi: An env0 environment maps to a Pulumi stack. For instance, a
dev-infraenv0 environment corresponds to a Pulumi stack for development infrastructure. - Kubernetes: An env0 environment relates to a Kubernetes namespace or a set of YAML files. For example, a
qa-clusterenv0 environment matches a Kubernetes namespace or a collection of resources. - Helm: An env0 environment aligns with a Helm release. For instance, a
prod-chartenv0 environment corresponds to a Helm release for production charts.
View Environment Details
To view your environments, choose a Project and then select the Environments tab.
The Environments screen shows a list of all the environments in the current project that you have permission to see.
For each environment, you can see the template it came from, the revision (the Git branch on which its Terraform code resides), the owner, the status, the remaining time-to-live, and the number of cloud resources it currently consumes (this is relevant for Active environments).
To perform actions on an environment or to view more details, click on it and then drill down to Environment Details.
In the Environment Details screen, you can execute operations such as Destroy Environment or Redeploy. You can also view the logs from the latest deployment, the Terraform outputs, the Variables used in Deploy, and the Deployment History.
Environment Status
An environment can be in one of the following states:
- Active - successfully deployed and up and running
- Inactive - successfully destroyed, manually or automatically.
- Deploy in progress - currently being deployed.
- Undeploy in progress - currently being undeployed.
- Failed - errors were encountered during deployment/undeployment
- Waiting for approval - a change has been initiated by a user with a Planner role; a Deployer's approval is required to execute the change.
Environment Resources
When your environment is in the Active status, you are able to see the resources it includes just by clicking into the Environment.
Resources are grouped by their 'provider' and 'type' - for example, all AWS S3 buckets will appear together.
Use the search box in the top right to filter the resources list.

Example of the resources list
Time to Live (TTL)
Time-to-live is the amount of time before env0 automatically destroys the Active environment.
You set time-to-live when you create or redeploy an environment. Possible predefined values are: 12 hours, 1 day, 3 days, 1 week, 1 month, and infinite. It is also possible to set a specific date for the environment's end of life.
An infinite time-to-live means the environment will never be destroyed automatically. This is useful for static environments like staging or production, but is not recommended for development environments.
An administrator can control the default and the maximum TTL values using TTL Policies.
Non-admin users can set the time-to-live to any value that the Policy for the current Project allows. Users with an admin role are not restricted by TTL policy.
Terragrunt Working Directory
The working directory of your Terragrunt deployment.
This will give you the ability to define one template per repo or folder and create an environment based on your Terragrunt folder structure.
Create an Environment
To create an environment, choose the option that best fits your style and use case as described in Setting Up a New Environment
After the environment is created, the Environment Details page will open and the progress will be shown in the Deployment Logs section.
During the deployment, env0 runs terraform plan and terraform apply commands. The outputs and state are stored.
If the deployment is successful, its status will be set to Active and the user will receive an email notification that the environment has been successfully created.
If the deployment fails, the user will get an email notification (with details) and the environment status will be set to Failed.
Destroy an Environment
An environment set with a time-to-live other than infinite is automatically destroyed when its time limit is reached.
To manually destroy an environment, select the Environment Details page of an Active environment, and click Destroy Environment at the top right (it looks like a stop sign).
For any destroy process, whether it's via time-to-live or manual, if a current deploy or destroy of your environment is in process, your destroy will be queued and will automatically start once it reaches its turn. You can cancel a queued destroy from the Deployments tab.
When an Active environment is destroyed, an undeploy process starts. If it ends successfully, the environment status is set to Inactive and the user will receive an email notification that the environment has been destroyed.
If the undeployment fails, the environment status will be set to Failed and the user will receive an email notification with details.
When destroying an environment, env0 will use the same code that was used in the last deploy process. If you'd like an updated code version to be used in the undeploy process, enable the "Checkout updated code" option.
Archive an Environment
You can archive an environment if you no longer want to track it in env0.
Doing so won't destroy resources, it would simply mark it as inactive, remove ongoing/scheduled deployments, and won't appear in the project's environment list.
You can see archived environments in the inactive tab on the project environments page, and you can unarchive them by repeating the same process or redeploying them.
Redeploy an Environment
To redeploy an environment, navigate to the Environment Details page, and then click Redeploy in the top right corner.
If your environment is currently running a deploy/destroy, your new deployment will be queued and will start after the current deploy/destroy is complete. You can view your previous and queued deployments - as well as cancel a queued deployment - from the Deployments tab.
Redeploy on an Inactive Environment
When you redeploy an Inactive environment, env0 will execute terraform apply on the environment, and deploy it again. If the deployment is successful the environment will go back to Active.
As part of the redeploy, a new time-to-live needs to be set for the environment. If the time-to-live is not changed, the destroy time set for the original deployment will be used for the new one. If this date has passed, you will not be able to run the redeploy until a new time-to-live is set.
In addition to time-to-live, new values can be assigned to other variables.
Redeploy an Active Environment
When you redeploy an Active environment, the environment is updated with all changes made in the code for the template.
You can set a new value for time-to-live, but this is not necessary. The values of other variables can also be altered.
Aborting deploy/destroy
It is possible to stop an ongoing deploy/destroy that was made by mistake, encountered some issues, or just took too long.
To abort a deploy/destroy of an environment, navigate to the Environment Details page, and then click the red Abort button in the top right corner.

Aborting is a destructive actionWhen aborting, a graceful shutdown of the current execution is attempted with a 1 minute timeout. When the timeout point has been reached, the deploy/destroy process will be forcefully terminated.
Therefore, aborting a deploy/destroy might result in a lost state or orphaned resources.
Please use it with caution.
Cancel Queued deploy/destroy
When your environment is in the process of a destroy or deploy, requested actions (deploy/destroy) will enter a Queued state and will be initiated after current actions are completed. If you wish to cancel any of these queued actions before they are initiated, you can do so by using the Cancel button that is on the right side of the table in the Deployments tab.

If you have many Queued deployments, you can cancel them all at once by using the Cancel All Queued Deployments button that is in the environment's details menu.

Import An Existing Environment
In order to import an existing environment you’ll need to have already completed these prerequisites
- Connect your VCS and your cloud account
- Create a template pointing to your Terraform code
- Add any variables with which your existing environment was deployed
Importing Existing EnvironmentsYou can import already-running environments into env0 by using a remote state backend, as long as it was deployed via Terraform.
Once you've completed that, just follow these steps:
- Go to your Default Organization Project and enter the Project Templates page
- Find the template you’ve added, and click Run Now
- Under Workspace Name, enter your existing Terraform workspace name
- Uncheck the “Approve plan automatically” checkbox. This will guarantee that no changes will be made accidentally
- Click Run
Terraform will read the existing state from your remote backend, and a plan will be created and displayed for your approval. If the code and variables are identical to how you last deployed this environment, you will see that there are no resources planned to change.
If you are happy with the results of the plan, click Approve, or Cancel.
Your environment is now managed by env0!
Approval Flow
For every flow executed on an environment (create, destroy, or redeploy), env0 first creates a Terraform Plan. Executing the plan requires approval from a user with Deployer privileges.
Users with a Deployer or Admin role can have their action automatically approved by checking the “Approve plan automatically” checkbox. In this case, the plan will execute with no need for further approval.
If you'd like to change an existing environment's default behavior for this setting, you can set it through the environment view page, under the Settings tab in the General Settings card:

A user with a Planner role cannot automatically approve their own plans.
If the user doesn't enable automatic approval, env0 will only perform a Terraform Plan, and then wait until a Deployer has approved the plan.
An environment that is waiting for approval will have the status of Waiting for Approval. A user with a Deployer role can approve the plan for deployment or cancel it. Go to the Environment Details screen, and click Deploy for the plan to be executed, or Cancel to cancel it.
Inactive Environments
To help users manage their environments, env0 will automatically move destroyed environments to the INACTIVE list.
As an Organization Admin you may also manually mark an environment as Inactive.
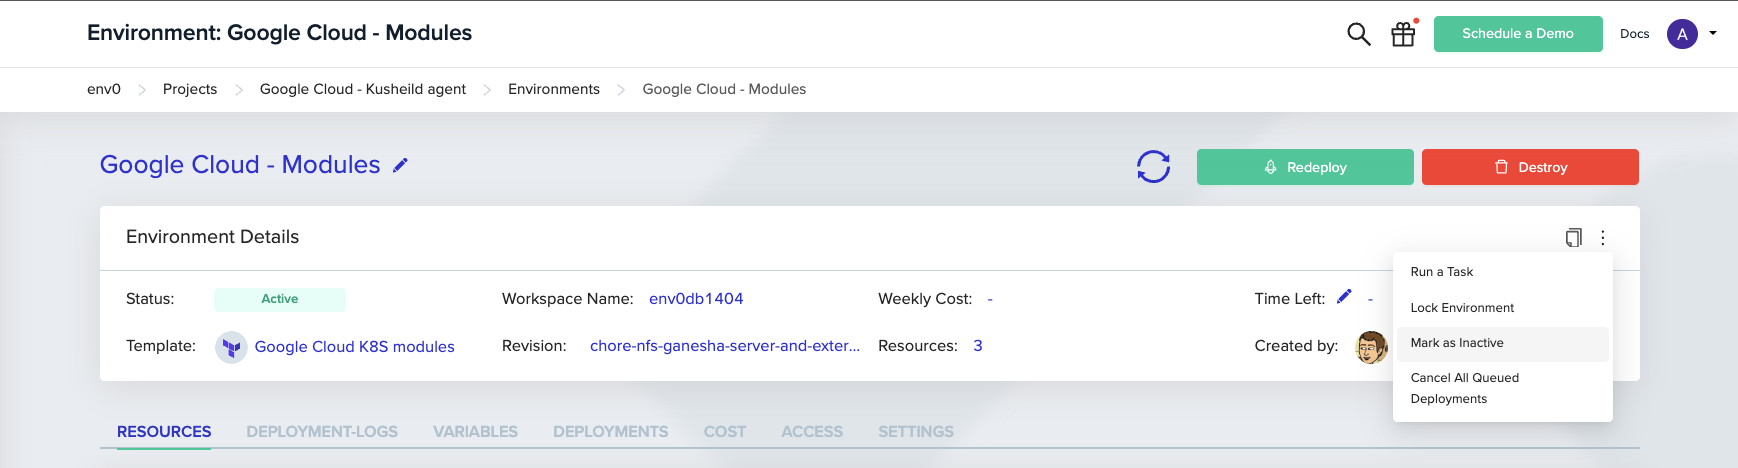
Admins can manually mark an environment as Inactive by clicking the vertical three dots icon on the top right-hand side of the Environment page, and choose "Mark as Inactive."

Doing so will not remove any infrastructure managed by this environment, but simply move it to the Inactive environment list.
Deployment Comments
You can add a comment upon environment creation, re-deployment, destruction, and when running tasks.
Adding comments lets you provide context and explanations for why the action was taken, letting others better understand the reasoning behind the changes, and making it easier to track and communicate about those changes within a team.
To add a comment, write your desired text in the Comment input field:

The comment will be displayed on the Deployment page.

Markdown SupportThe deployment comment supports Markdown, so you would be able to generate even more context.
Finding The Environment ID
Sometimes you may need your environment ID for using it in our terraform provider or for some API calls.
You can find it in the detailed card at the top of the environment page.

Redeploy Environment with Different Template
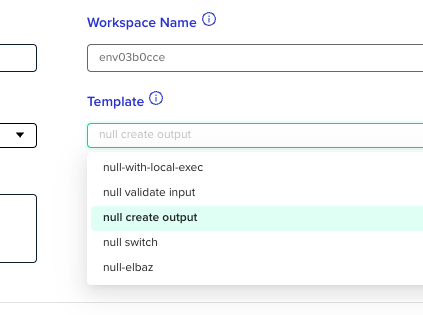
If you would like to change your environment's template you can do it via the "Redeploy with Different Template" option.

You will be redirected to the Redeploy page, where you’ll have a drop-down menu from which you can change the environment template.
✏️ Suggested Blog Content
Updated 10 days ago