OIDC With Vault
How to authenticate the env0 runner using Vault and OIDC
This guide is to help you connect to Vault with OIDC.
Overview
This guide will show you how to create a JWT Authentication Method, and how to configure env0 to utilize OIDC to authenticate to your vault cluster to retrieve secrets. Refer to env0's OIDC configuration.
We are going to follow the Vault documentation on how to create a JWT Authentication
JWT Authentication Method
- Login to your vault cluster
- In the side navigation bar click on
Access - Choose
Authentication Methodsin the left side menu - Click on the
Enable new methodbutton and it will open the Authentication method creation wizard - Choose
JWT - Expand
Method Optionsadd a description and the relevant configuration and click on theEnabled Methodbutton - In the
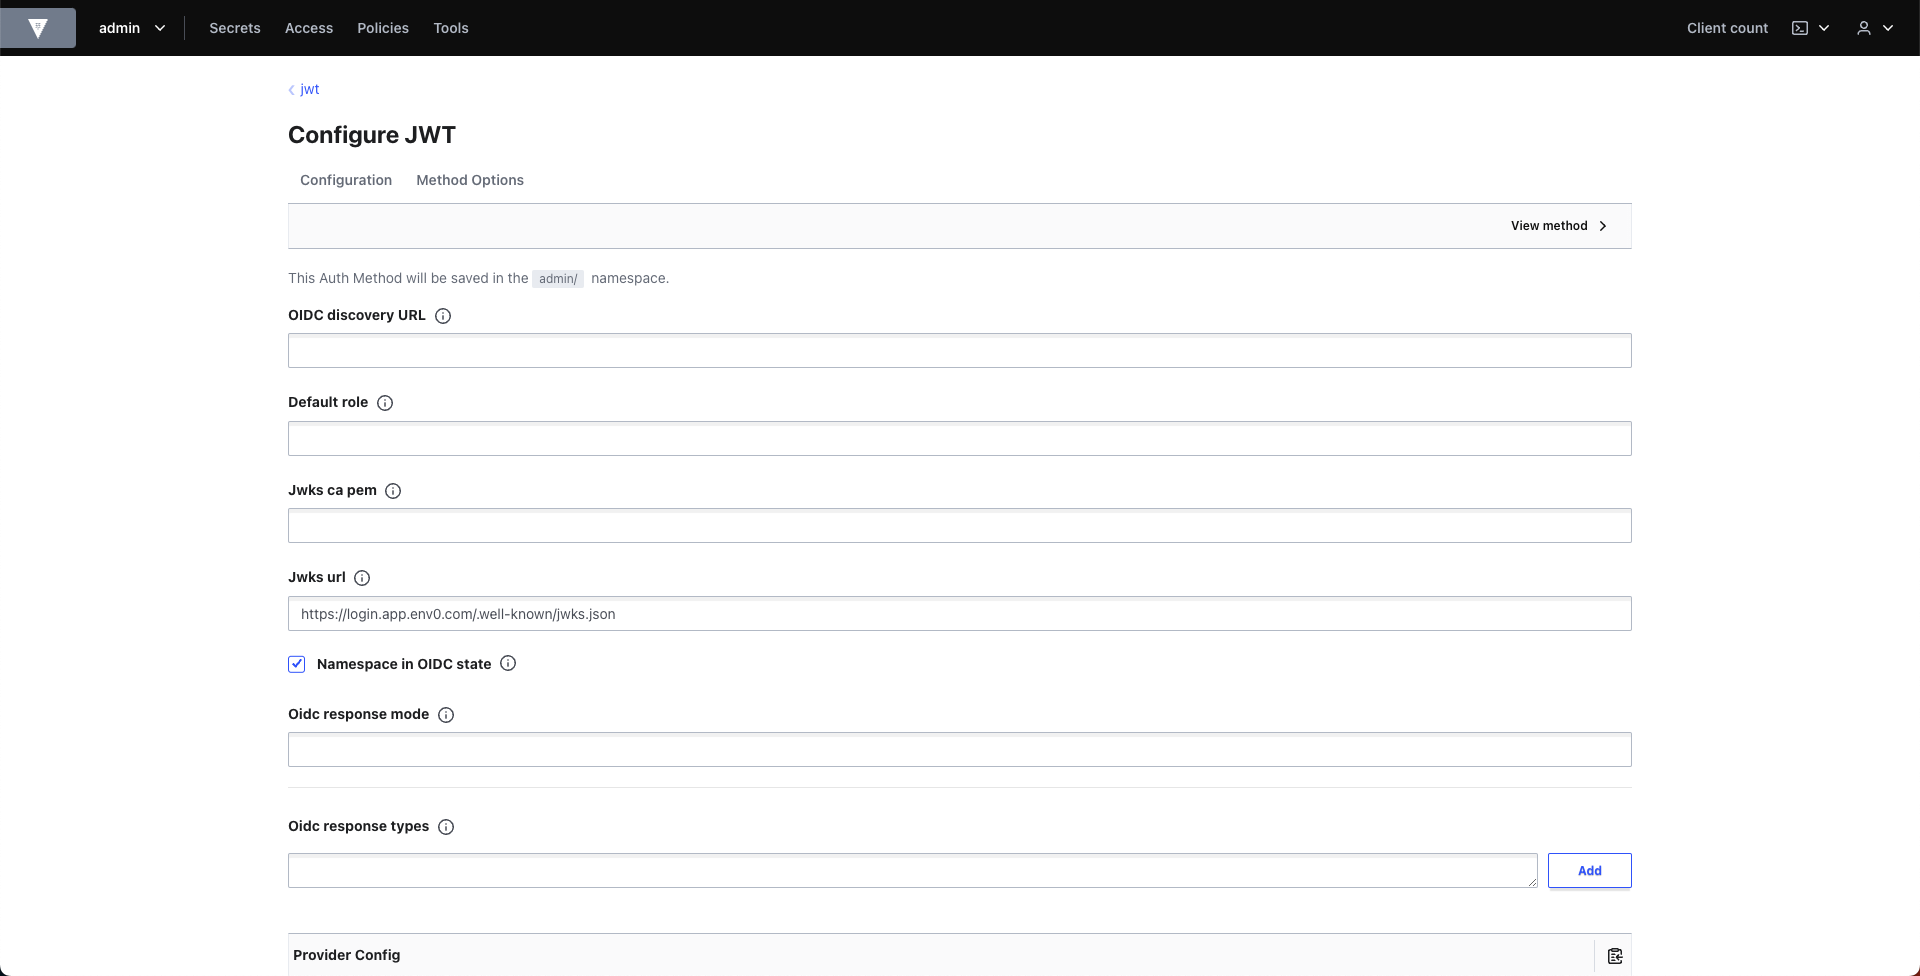
Configure JWTpage under theJwks urlenterhttps://login.app.env0.com/.well-known/jwks.json - Expand
JWT Optionsand set theBound issuerto behttps://login.app.env0.com/ - Click on the
Savebutton

Configure JWT
Setup Secrets Store and Create Policy
Create a KV store in vault to save and fetch secrets.
vault secrets enable -path=secrets-for-env0/ kv
A policy needs to be created to define which secrets can be accessed. Here's an example:
vault policy write env0-access - <<EOF
path "secrets-for-env0/*" {
    capabilities = ["read", "create", "update"]
}
EOF
Create Login Role
To create the role that binds the policy, sub, aud and env0 custom claims we will use the vault CLI. Make sure you have it installed on your machine and that you have access to vault. Export the following environment variables:
export ENV0_ORG_ID="your_env0_org_id"
export VAULT_ROLE_NAME="your_vault_role_name"
export VAULT_ADDR="your_vault_address_url"
export VAULT_NAMESPACE="your_vault_namespace" (optional)
export VAULT_TOKEN="your_vault_token"
Vault CLI uses the VAULT_TOKEN environment variable to authenticate but if you prefer, you can skip it and use vault login instead.
Now execute the following command to create the role:
vault write auth/jwt/role/$VAULT_ROLE_NAME - <<EOF
{
  "user_claim": "sub",
  "role_type": "jwt",
  "policies": ["env0-access"],
  "bound_audiences": ["https://prod.env0.com"],
  "bound_claims": {
    "organizationId": "$ENV0_ORG_ID",
    "apiKeyType": "oidc"
  }
}
EOF
More Claims
In this example we only set the
aud, theorganizationIdand theapiKeyTypeclaims, however you can also set any additional claims you would like from the list of claims we support. The list is located here
Authenticating to Vault with Env0 Credential
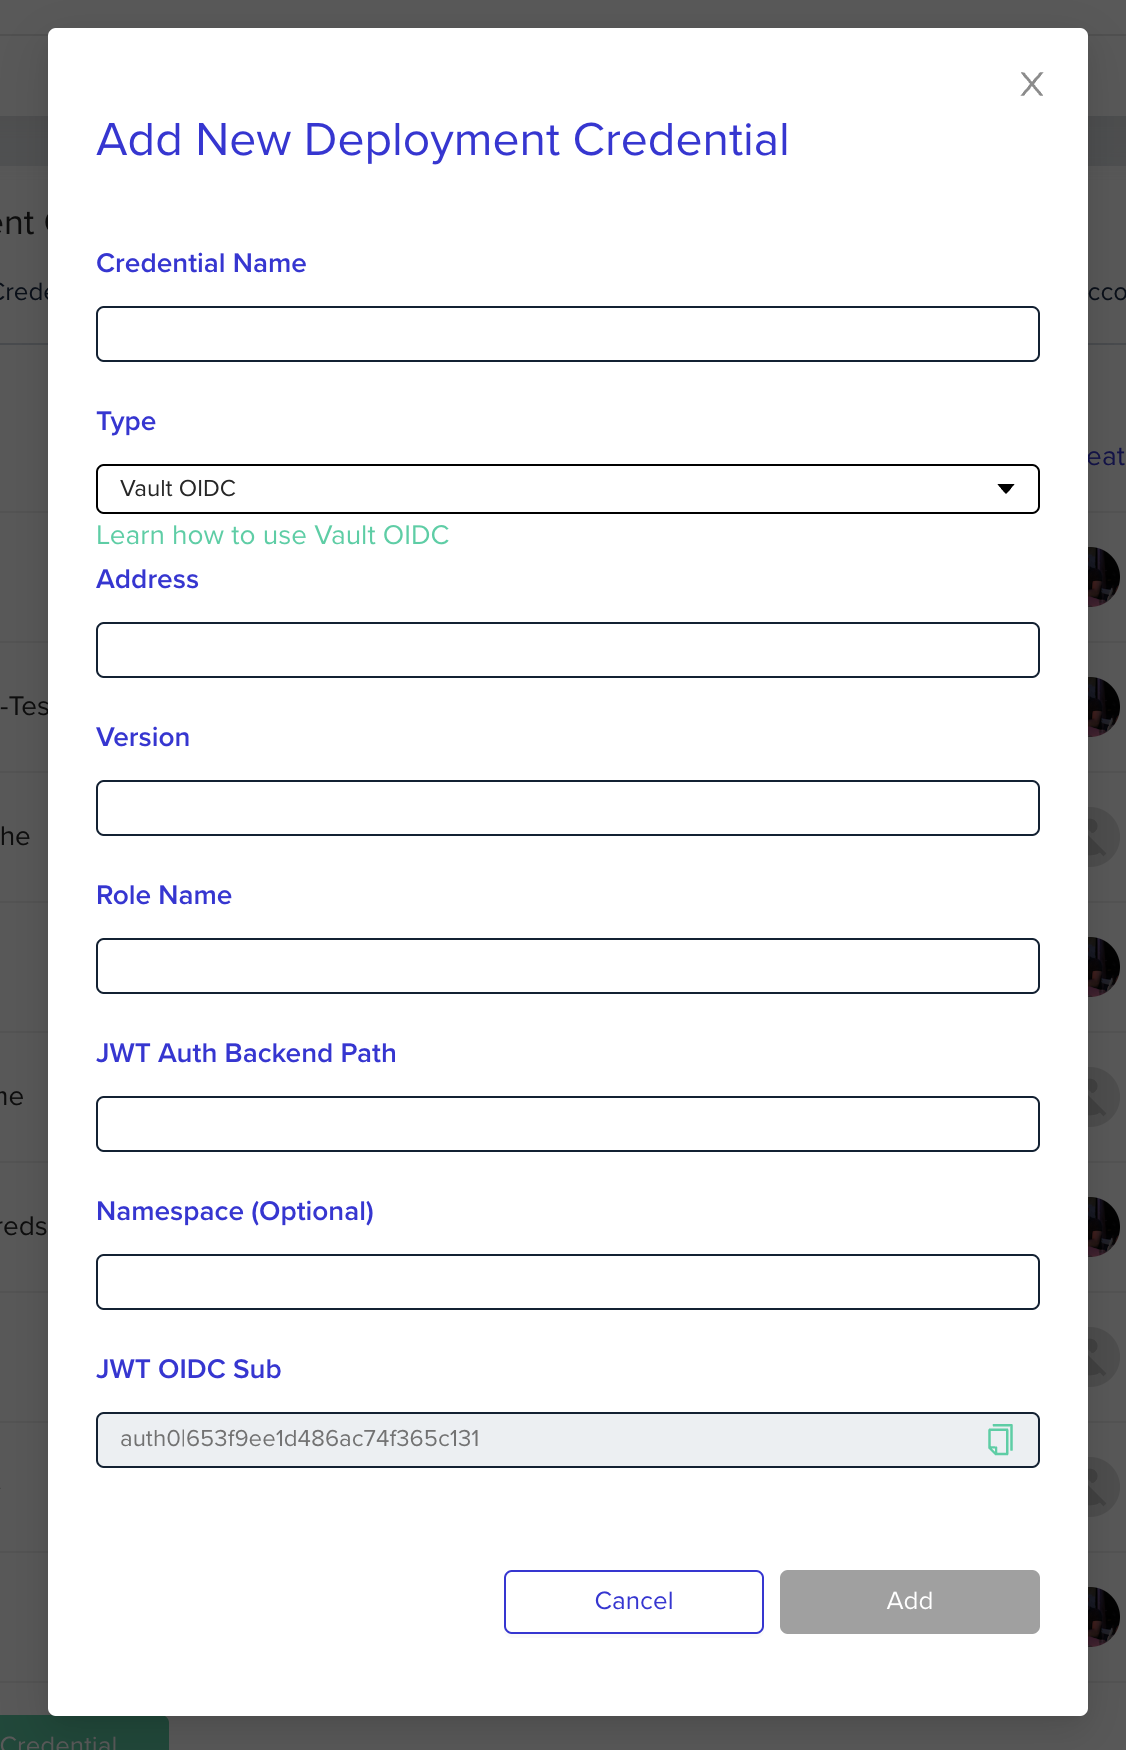
Go to the organization's credentials page and create a new deployment credential. Select Vault OIDC type and enter the following fields:
Address- The vault address, including portVersion- The vault version to useRole Name- Vault role nameJWT Auth Backend Path- Path to the new authentication methodNamespace- Optional, the vault namespace

After creating the credential you will need to go to the relevant project and assign that credential to the project in the project's credentials page. Now all environments within the project will have the relevant environment variables available.
Authenticating to Vault with Terraform Provider
To configure the vault terraform provider all you need is the vault provider block and the VAULT OIDC deployment credentials set on the project. Example:
provider "vault" {
  address          = var.vault_address
  skip_child_token = true (depends on your role vault policy)
}
The VAULT OIDC deployment credentials are used to authenticate with the vault server along with the ENV0_OIDC_TOKEN JWT token which then sets the VAULT_TOKEN variable with the actual session token that is returned from the vault server used for authentication/authorization.
Updated about 1 month ago
